大部分人应该都知道Swagger是帮我们的Web API快速生成接口文档,前面我们也有提到.Net Core3.x集成Swagger,这里,我们再来归纳一下Spring Boot集成Swagger的常规操作
创建一个Spring Boot项目
创建Spring Boot应用的方式有很多,如:直接访问spring提供的项目生成工具https://start.spring.io/、或者Idea里面的Spring Initializr模块创建等等。
这里我们就直接通过Idea工具来创建,
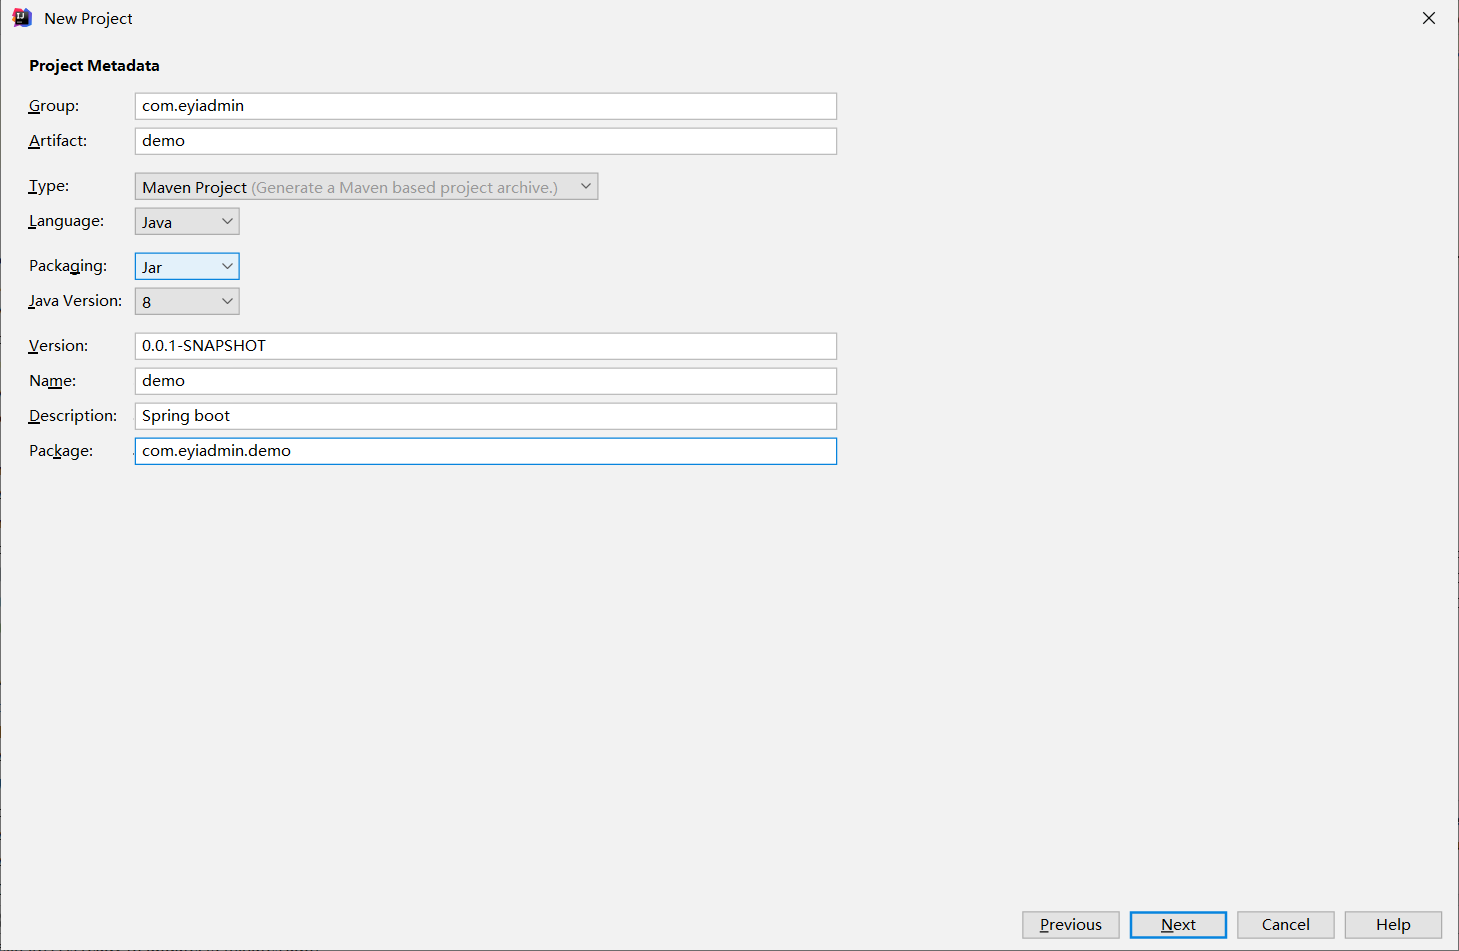

创建完成后,就是maven自动安装包了。
集成Swagger
首先,我们需要引入引入jar包:
1 | <!-- https://mvnrepository.com/artifact/io.springfox/springfox-swagger2 --> |
配置Swagger
- 新建一个
SwaggerConfiguration类,添加注解@Configuration、@EnableSwagger21
2
3
4
5
6
7
8
9
10
11
12
13
14
15
16
17
18
19
20
21
22
23@Configuration
@EnableSwagger2
public class SwaggerConfiguration {
@Bean
public Docket createRestApi() {
return new Docket(DocumentationType.SWAGGER_2)
.apiInfo( new ApiInfoBuilder()
//页面标题
.title("Demo Web Api文档")
//创建人
.contact(new Contact("eyiadmin", "https://springfox.github.io/springfox/", "eyiadmin@163.com"))
.version("1.0")
.description("Demo Web Api文档")
.build())
.select()
//API接口所在的包位置
.apis(RequestHandlerSelectors.basePackage("com.eyiadmin.demo.controller"))
.paths(PathSelectors.any())
.build();
}
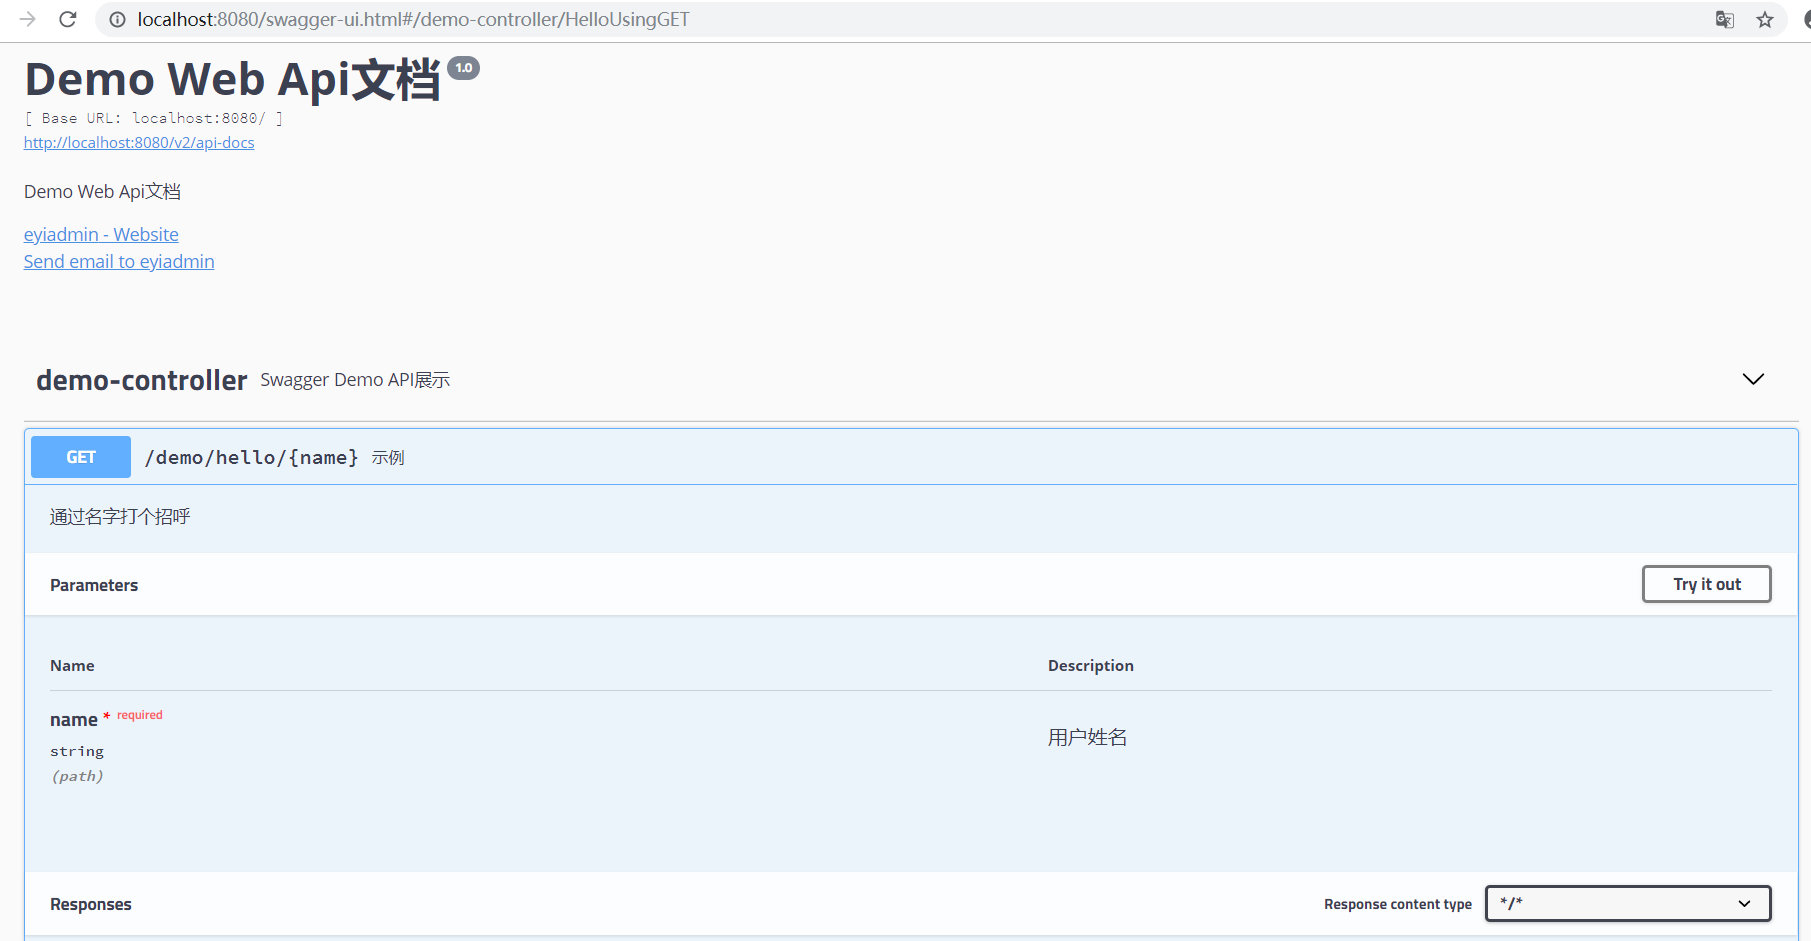
} - 配置Controller:启动起来,访问localhost:8080/swagger-ui.html,还是那个熟悉的界面:
1
2
3
4
5
6
7
8
9
10
11
12@Api(tags = {"Swagger Demo API展示"})
@RequestMapping("/demo")
@RestController
public class DemoController {
@ApiOperation(value = "示例", notes = "通过名字打个招呼")
@RequestMapping(value = "hello/{name}", method= RequestMethod.GET)
public ResponseEntity<String> Hello(@ApiParam(value = "用户姓名",required = true) @PathVariable String name)
{
return new ResponseEntity<>(String.format("Hello %s!",name), HttpStatus.OK);
}
}
使用Swagger增强版knife4j-spring-ui
在https://gitee.com/xiaoym/knife4j提供了swagger-bootstrap-ui,界面相对来说更加美观,也可以导出md文档,同时可以借助其他工具转成pdf等文档
我们把修改一下pom.xml文件,将swagger替换成knife4j:
1 | <dependency> |
修改配置类:
1 | @Configuration |
启动Spring Boot,访问localhost:8080/doc.html: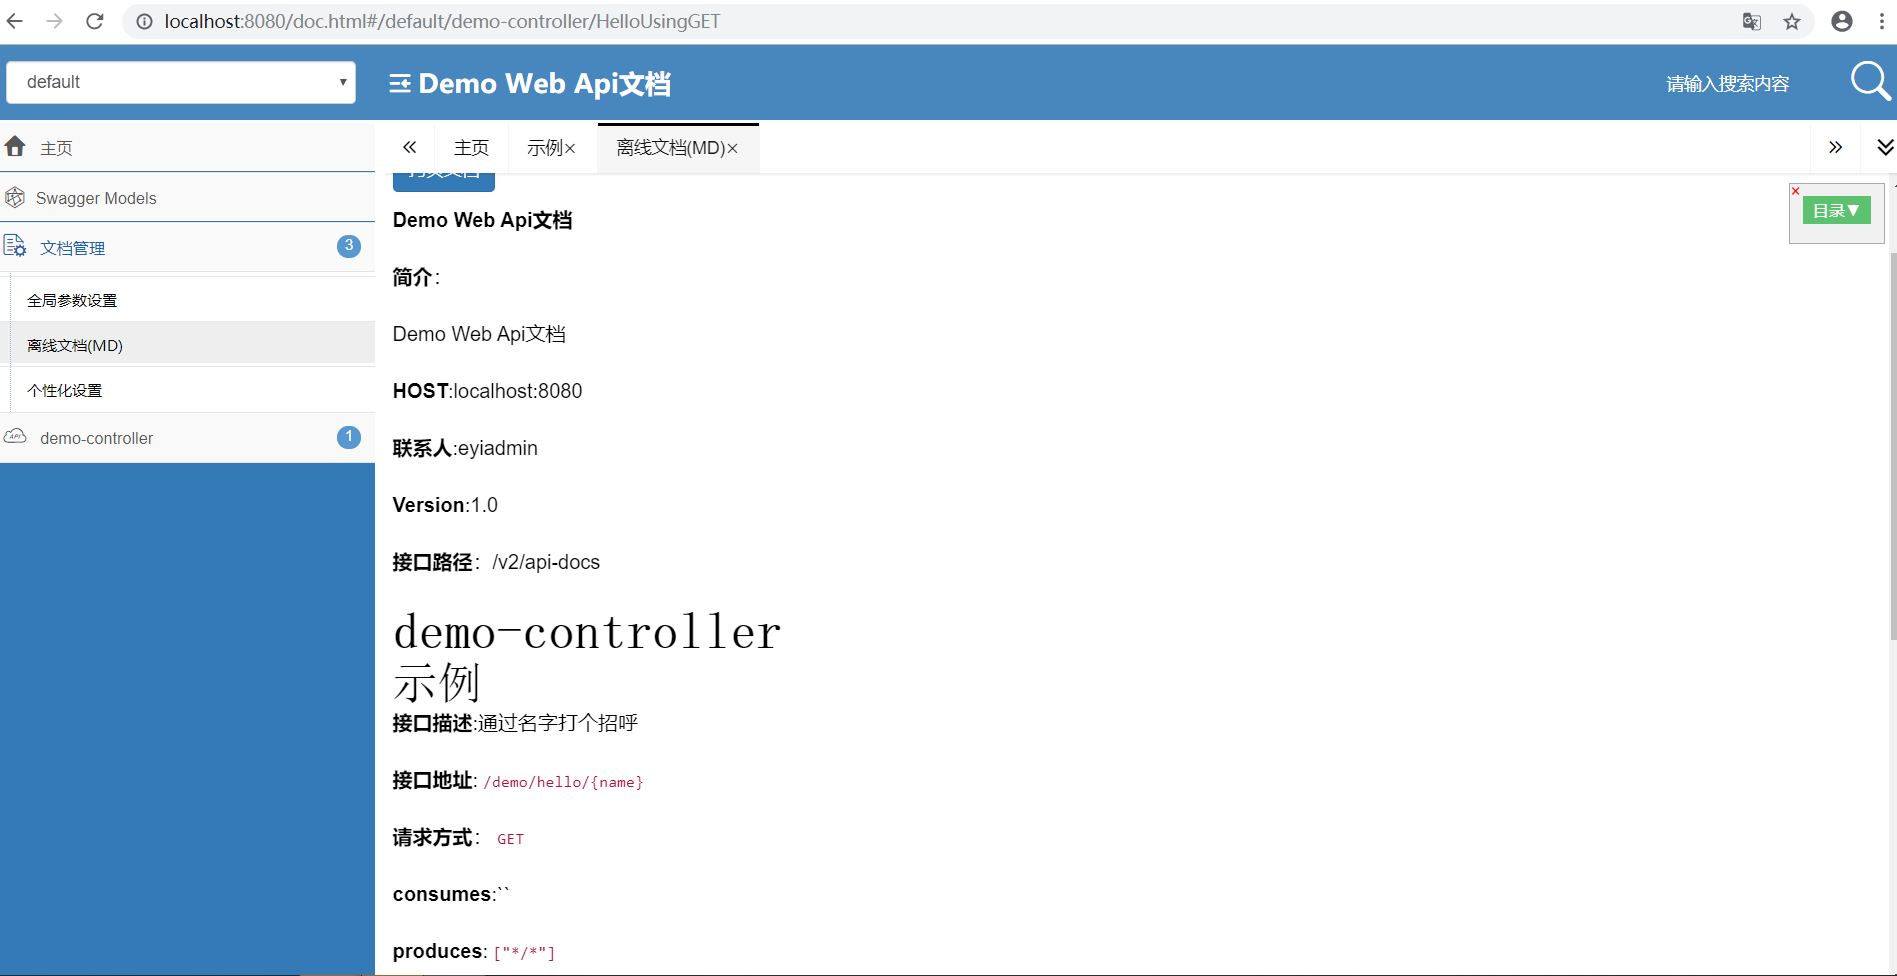
至此,Spring Boot集成Swagger暂时告一段落,下面,我会整理一些Swagger 常用注解.
@Api一般作用于Controller类,标识类作用说明
1 | 参数说明: |
@ApiOperation一般作用于方法,标识说明该方法的作用
1 | 参数说明: |
@ApiParam作用于方法,解释方法中的参数说明
1 | public ResponseEntity<String> Hello(@ApiParam(value = "参数名称",required = true) @PathVariable String name) |
@ApiModel作用于VO类,解释说明类
1 | @ApiModel("例如说明") |
@ApiModelProperty作用于字段属性,为VO类属性解释说明
1 | @ApiModelProperty("用户名") |
