在.net core中,常用的日志组件大概就是Logging(自带)、Log4net 和NLog 等,其他的我目前还没有用到。我觉得NLog简单易用,性能也不错,支持多种日志写入方式 。
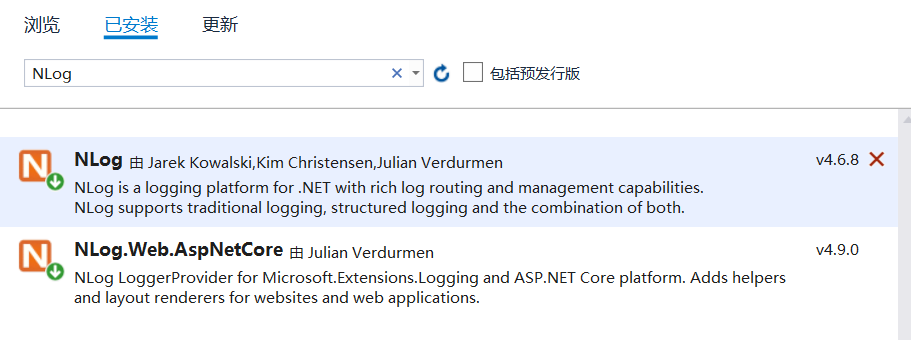
安装NLog 首先,我们通过Nuget安装NLog和NLog.Web.AspNetCore两个组件,我安装的版本是:
创建NLog配置文件 在web目录新建一个nlog.config文件,内容 如下:
1
2
3
4
5
6
7
8
9
10
11
12
13
14
15
16
17
18
19
20
21
22
23
24
25
26
27
28
29
30
31
32
33
34
35
36
37
38
39
40
41
42
43
44
45
46
47
<?xml version="1.0" encoding="utf-8" ?> <?xml version="1.0" encoding="utf-8" ?> <nlog xmlns="http://www.nlog-project.org/schemas/NLog.xsd" xmlns:xsi="http://www.w3.org/2001/XMLSchema-instance" autoReload="true" internalLogLevel="Info" internalLogFile="logs\internal-nlog.txt"> <!-- enable asp.net core layout renderers --> <extensions> <add assembly="NLog.Web.AspNetCore"/> </extensions> <!-- the targets to write to --> <targets> <!-- write logs to file --> <target xsi:type="File" name="allfile" fileName="logs\nlog-all-${shortdate}.log" layout="${longdate}|${event-properties:item=EventId_Id}|${threadid}|${activityid}|${uppercase:${level}}|${logger}|${message} ${exception:format=tostring}" maxArchiveFiles="4" archiveAboveSize="10240" archiveEvery="Day"/> <!-- another file log, only own logs. Uses some ASP.NET core renderers --> <target xsi:type="File" name="ownFile-web" fileName="logs\nlog-own-${shortdate}.log" layout="${longdate}|${event-properties:item=EventId_Id}|threadid-${threadid}|activityid-${activityid}|${uppercase:${level}}|${logger}|${message} ${exception:format=tostring}|url: ${aspnet-request-url}|action: ${aspnet-mvc-action}" maxArchiveFiles="4" archiveAboveSize="10240" archiveEvery="Day"/> <target name="file" xsi:type="AsyncWrapper" queueLimit="5000" overflowAction="Discard"> <target xsi:type="File" fileName="${basedir}/logs/${level}.txt" keepFileOpen="true" layout="${longdate}|${event-properties:item=EventId_Id}|threadid-${threadid}|activityid-${activityid}|${uppercase:${level}}|${logger}|${message} ${exception:format=tostring}|url: ${aspnet-request-url}|action: ${aspnet-mvc-action}" maxArchiveFiles="4" archiveAboveSize="10240" archiveEvery="Day"/> </target> </targets> <!-- rules to map from logger name to target --> <rules> <!--All logs, including from Microsoft--> <logger name="*" minlevel="Trace" writeTo="allfile" /> <!--Skip non-critical Microsoft logs and so log only own logs--> <logger name="Microsoft.*" maxlevel="Info" final="true" /> <!-- BlackHole without writeTo --> <logger name="*" minlevel="Trace" writeTo="ownFile-web" /> <logger name="*" minlevel="Debug" writeTo="file" /> </rules> </nlog>
使用NLog 我们首先在Program使用注册NLog:
1
2
3
4
5
6
7
8
9
10
11
public static IHostBuilder CreateHostBuilder(string[] args) => Host.CreateDefaultBuilder(args) .UseServiceProviderFactory(new AutofacServiceProviderFactory()) .ConfigureWebHostDefaults(webBuilder => { webBuilder.UseStartup<Startup>(); }).ConfigureLogging(logging => { logging.ClearProviders(); //删除日志组件 logging.SetMinimumLevel(Microsoft.Extensions.Logging.LogLevel.Trace); }).UseNLog();
然后,我们就可以再相应的地方调用:
1
2
3
4
5
6
7
8
9
10
11
12
13
14
15
[ApiVersion("1.0")] [Route("api/v{version:apiVersion}/[controller]")] [ApiController] public class ExampleController : ControllerBase { private readonly ILogger<ExampleController> _logger; IExampleService _exampleService; public ExampleController(IExampleService exampleService, ILogger<ExampleController> logger) { _logger = logger; _exampleService = exampleService; _logger.LogDebug("NLog injected"); } }
效果如下:
1 2019-12-25 17:09:48.5355||DEBUG|Web.Controllers.v1.ExampleController|NLog injected
NLog类似于string.Format的格式,如:
1 _logger.LogInformation("Hello, {0}", Name);
最终结果:
1 2019-12-25 17:35:57.4098||threadid-10||INFO|Web.Controllers.v1.ExampleController|Hello, Jane |url: http://localhost/api/v1.0/Example/GetName/Jane|action: GetName
也支持格式化和对象:
1 2 _logger.LogInformation("Hello,{name}",Name); _logger.LogInformation("Hello,{Name}", new { Name = Name });
效果:
1
2
3
2019-12-25 17:35:57.4288||threadid-10||INFO|Web.Controllers.v1.ExampleController|Hello,Jane |url: http://localhost/api/v1.0/Example/GetName/Jane|action: GetName 2019-12-25 17:35:57.4288||threadid-10||INFO|Web.Controllers.v1.ExampleController|Hello,{ Name = Jane } |url: http://localhost/api/v1.0/Example/GetName/Jane|action: GetName
更多配置看NLog 的文档。
上下文信息 如果是单体应用的话,用上面的配置即可, 但是,我们现在经常会用到微服务或者是异步。微服务一般使用MDC的方式,这里我们暂时只说说异步,大家都知道异步是会在创新新线程执行,这时候的线程Id就不和主线程在同一个上下文中了。我们来试试看:
1
2
3
4
5
6
7
8
9
10
11
12
13
14
15
16
17
18
/// <summary> /// 异步调用 /// </summary> /// <param name="Name"></param> /// <returns></returns> [HttpGet] [Route("GetNameAsync/{Name}")] public async Task<string> GetNameAsync(string Name) { _logger.LogInformation("Hello,{0}", Name); string result = ""; await Task.Run(() => { _logger.LogInformation("Hello,{0}", Name); result = $"Hello,{Name}"; }); return result; }
打印两次, 最终日志为:
1
2
2019-12-25 17:55:45.5634||threadid-5|activityid-|INFO|Web.Controllers.v1.ExampleController|Hello,Jane |url: http://localhost/api/v1.0/Example/GetNameAsync/Jane|action: GetName 2019-12-25 17:55:45.5634||threadid-4|activityid-|INFO|Web.Controllers.v1.ExampleController|Hello,Jane |url: http://localhost/api/v1.0/Example/GetNameAsync/Jane|action: GetName
可以看到我们的threadid不一样。这样在我们捕捉日志的时候会变得很困难,这时候,NLog的ndlc就可以帮我们解决这个问题,我们修改一下nlog.config的layout配置:
1 ${longdate}|${event-properties:item=EventId_Id}|NDLC-${ndlc}|threadid-${threadid}|activityid-${activityid}|${uppercase:${level}}|${logger}|${message} ${exception:format=tostring}|url: ${aspnet-request-url}|action: ${aspnet-mvc-action}
效果如下:
1
2
2019-12-26 08:58:30.6271||NDLC-ConnectionId:0HLS9JGU66BD8 RequestPath:/api/v1.0/Example/GetNameAsync/Jane RequestId:0HLS9JGU66BD8:00000001, SpanId:|59ece683-4c05d632d98d1cac., TraceId:59ece683-4c05d632d98d1cac, ParentId: Web.Controllers.v1.ExampleController.GetNameAsync (Web)|threadid-5|activityid-|INFO|Web.Controllers.v1.ExampleController|Hello,Jane |url: http://localhost/api/v1.0/Example/GetNameAsync/Jane|action: GetName 2019-12-26 08:58:30.6598||NDLC-ConnectionId:0HLS9JGU66BD8 RequestPath:/api/v1.0/Example/GetNameAsync/Jane RequestId:0HLS9JGU66BD8:00000001, SpanId:|59ece683-4c05d632d98d1cac., TraceId:59ece683-4c05d632d98d1cac, ParentId: Web.Controllers.v1.ExampleController.GetNameAsync (Web)|threadid-10|activityid-|INFO|Web.Controllers.v1.ExampleController|Hello,Jane |url: http://localhost/api/v1.0/Example/GetNameAsync/Jane|action: GetName
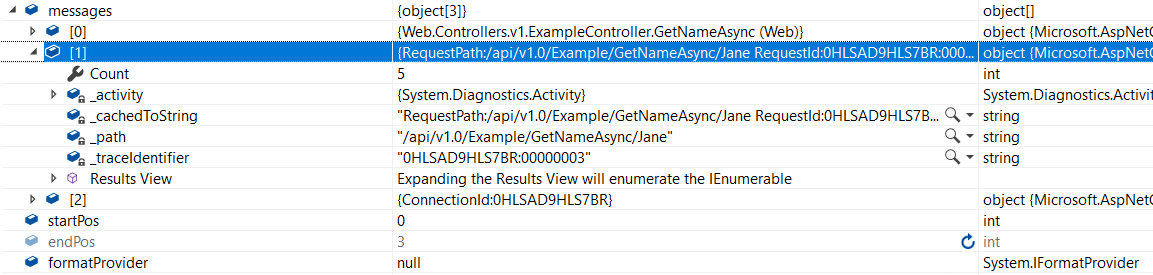
但是有些信息可能我们不需要,我先来看看NDLC的代码:
1
2
3
4
5
6
7
8
9
10
11
12
13
14
15
16
17
18
19
20
21
22
23
24
25
26
27
28
29
30
31
32
33
34
35
36
protected override void Append(StringBuilder builder, LogEventInfo logEvent) { if (TopFrames == 1) { // Allows fast rendering of topframes=1 var topFrame = NestedDiagnosticsLogicalContext.PeekObject(); if (topFrame != null) AppendAsString(topFrame, GetFormatProvider(logEvent), builder); return; } var messages = NestedDiagnosticsLogicalContext.GetAllObjects(); if (messages.Length == 0) return; int startPos = 0; int endPos = messages.Length; if (TopFrames != -1) { endPos = Math.Min(TopFrames, messages.Length); } else if (BottomFrames != -1) { startPos = messages.Length - Math.Min(BottomFrames, messages.Length); } var formatProvider = GetFormatProvider(logEvent); string currentSeparator = string.Empty; for (int i = endPos - 1; i >= startPos; --i) { builder.Append(currentSeparator); AppendAsString(messages[i], formatProvider, builder); currentSeparator = Separator; } }
在VS2019启用Source Link,就可以进入到我们的NLog组件,可以看到:ConnectionId的话,可以做如下修改:
1 ${longdate}|${event-properties:item=EventId_Id}|NDLC-${ndlc:bottomFrames=1}|threadid-${threadid}|activityid-${activityid}|${uppercase:${level}}|${logger}|${message} ${exception:format=tostring}|url: ${aspnet-request-url}|action: ${aspnet-mvc-action}
效果如下:
1
2
2019-12-26 10:56:53.0233||NDLC-ConnectionId:0HLS9LSTP4B7D|threadid-4|activityid-|INFO|Web.Controllers.v1.ExampleController|Hello,Jane |url: http://localhost/api/v1.0/Example/GetNameAsync/Jane|action: GetName 2019-12-26 10:56:53.4459||NDLC-ConnectionId:0HLS9LSTP4B7D|threadid-15|activityid-|INFO|Web.Controllers.v1.ExampleController|Hello,Jane |url: http://localhost/api/v1.0/Example/GetNameAsync/Jane|action: GetName
这样一来,我们就可以看到我们是否是同一个请求处理,其他更加强大的功能,有待探究。在这里我们有用到Source Link,确实还是比较方便,但是有一个更方便的工具,就是ReSharper ,但是安装ReSharper后,咱们的VS会有一点小卡。先到这里吧,后面有机会再单独记录一下Source Link以及ReSharper神器的强大功能。