.Net Core3.x部署到阿里云ACK中

.Net Core3.x部署到阿里云ACK中

前面,我使用自己的服务器基于Docker部署了core程序,现在我们来使用一下新的方法,将我们的程序发布到阿里云ACK中,如果是IDEA的话,可以使用Alibaba Cloud Toolkit实现快速部署,但是现在仅支持IntelliJ IDEA、Eclipse、PyCharm 以及其他、Mave,不过据说VS CODE快要来了。那么现在我们暂时就先手动来操作一番吧

发布Core程序

我习惯使用命令方式:

1
dotnet publish -r linux-x64 -o ./bin/output -c release

具体命令说明详见https://docs.microsoft.com/zh-cn/dotnet/core/tools/dotnet-publish?tabs=netcore21,其中的RID也比较重要,大家也需要了解一下.我们开始编写Dockerfile:

1
2
3
4
5
6
FROM mcr.microsoft.com/dotnet/core/runtime:3.1
WORKDIR /app
EXPOSE 80
EXPOSE 443
COPY [".", "."]
ENTRYPOINT ["dotnet", "Web.dll"]

开始构建:

1
2
3
4
5
6
7
8
9
10
11
12
13
14
15
16
17
18
19
20
21
22
23
24
25
26
27
28
29
30
31
[root@instance-p0a4erj8 core]# docker build -t core3.x-swagger -f Dockerfile .
Sending build context to Docker daemon 125.3MB
Step 1/6 : FROM mcr.microsoft.com/dotnet/core/runtime:3.1
3.1: Pulling from dotnet/core/runtime
000eee12ec04: Pull complete
67bac0b5d3cc: Pull complete
e8c80b499c83: Pull complete
77b73bc084ae: Pull complete
Digest: sha256:9946cd419d740e903f94677ed57af28f56e77b967186b868ed64765b870bf49d
Status: Downloaded newer image for mcr.microsoft.com/dotnet/core/runtime:3.1
---> 08d8cf51bdfd
Step 2/6 : WORKDIR /app
---> Running in 6663a593f044
Removing intermediate container 6663a593f044
---> bb8603da7b34
Step 3/6 : EXPOSE 80
---> Running in 8c844a10467e
Removing intermediate container 8c844a10467e
---> 61cf39dd9c13
Step 4/6 : EXPOSE 443
---> Running in 7a616725163c
Removing intermediate container 7a616725163c
---> 6ded800d3aec
Step 5/6 : COPY [".", "."]
---> 4eb15d11ccb0
Step 6/6 : ENTRYPOINT ["dotnet", "Web.dll"]
---> Running in a087553cf793
Removing intermediate container a087553cf793
---> 90fc47847faa
Successfully built 90fc47847faa
Successfully tagged core3.x-swagger:latest

运行我们的镜像:

1
docker run --name swagger -d -p 80:80 core3.x-swagger
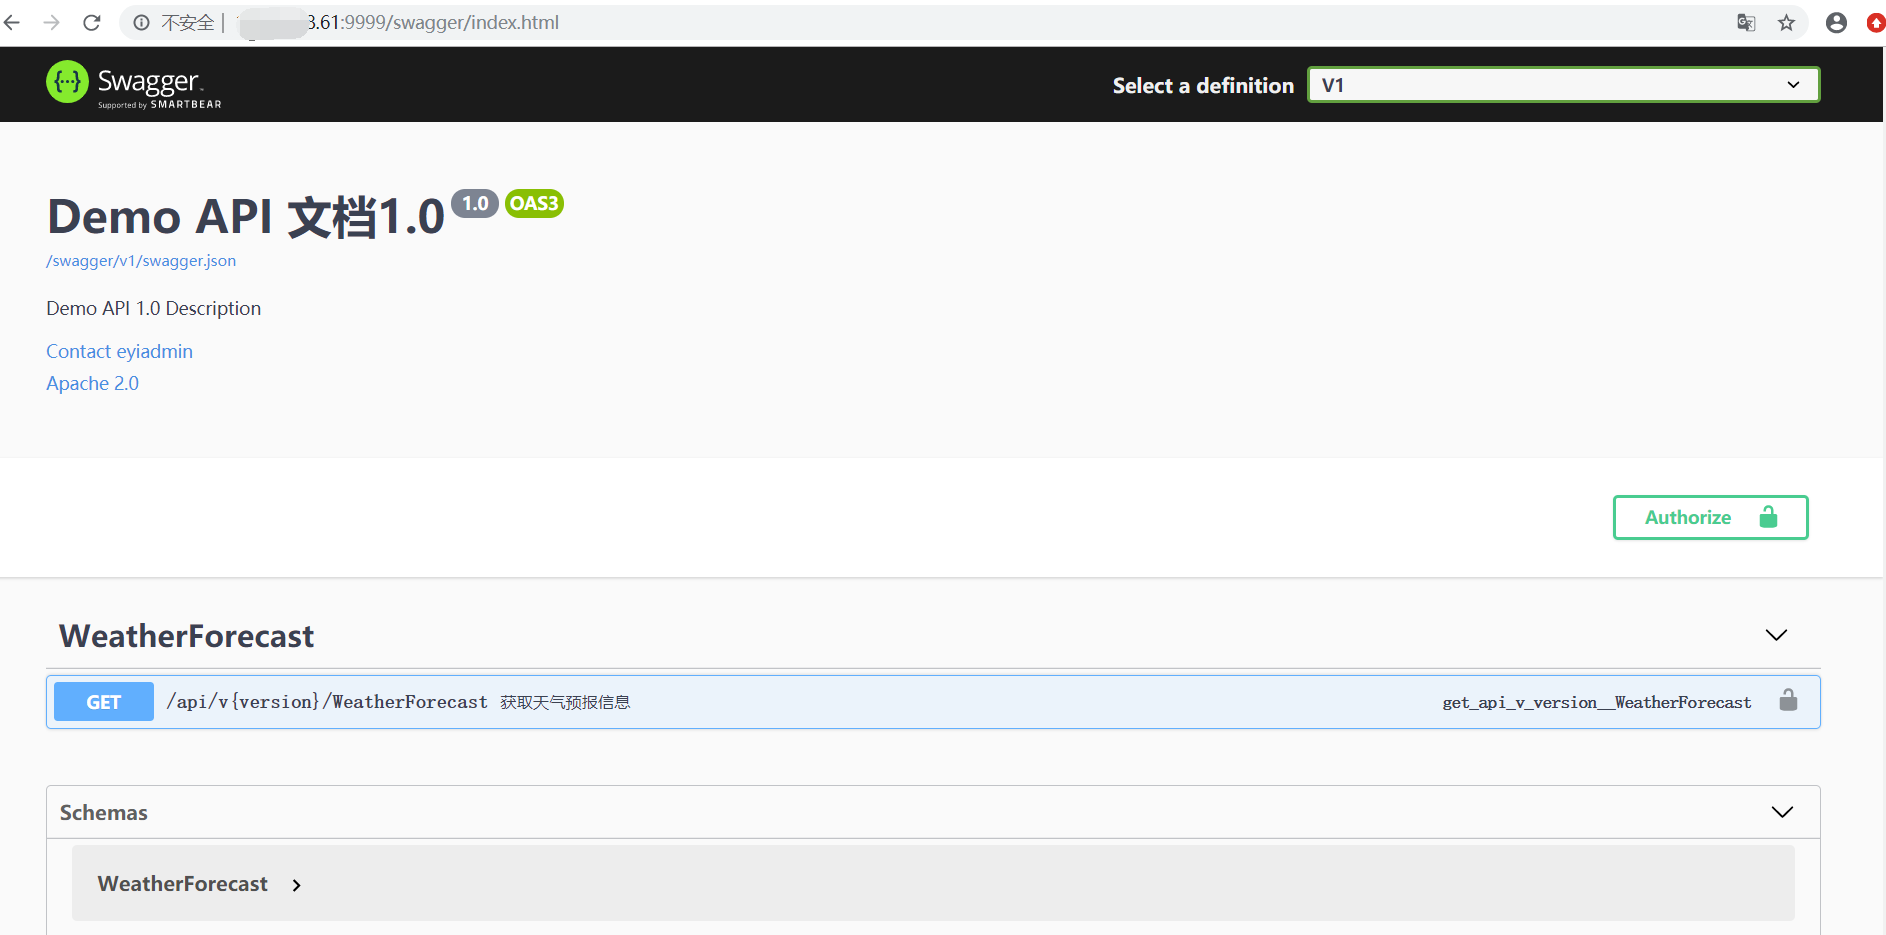
可以看到我们的容器已经启动好了。

1
2
3
[root@instance-p0a4erj8 ~]# docker ps -a
CONTAINER ID IMAGE COMMAND CREATED STATUS PORTS NAMES
eb38557539a9 core3.x-swagger "dotnet Web.dll" About a minute ago Up About a minute 0.0.0.0:80->80/tcp, 443/tcp swagger

可以查看一下日志:

1
2
3
4
5
6
7
8
9
10
11
[root@instance-p0a4erj8 ~]# docker logs eb38557539a9
info: Microsoft.Hosting.Lifetime[0]
Now listening on: http://[::]:80
info: Microsoft.Hosting.Lifetime[0]
Application started. Press Ctrl+C to shut down.
info: Microsoft.Hosting.Lifetime[0]
Hosting environment: Production
info: Microsoft.Hosting.Lifetime[0]
Content root path: /app
warn: Microsoft.AspNetCore.HttpsPolicy.HttpsRedirectionMiddleware[3]
Failed to determine the https port for redirect.

访问也是正常docker_swagger.
好,接下来,我们就上传到阿里的ACR上面。
先去https://cr.console.aliyun.com进行设置.首先需要提示设置密码.设置完后,会跳转到创建仓库页面


创建完成后,我们就开始登陆到ACR

1
2
3
4
5
6
7
[root@instance-p0a4erj8 ~]#  docker login --username=xxxxxx registry.cn-hangzhou.aliyuncs.com
Password:
WARNING! Your password will be stored unencrypted in /root/.docker/config.json.
Configure a credential helper to remove this warning. See
https://docs.docker.com/engine/reference/commandline/login/#credentials-store

Login Succeeded

推送镜像
1
2
3
4
5
6
7
8
9
10
11
12
13
14
 docker tag [ImageId] registry.cn-hangzhou.aliyuncs.com/52fx/52fx:[镜像版本号]
docker push registry.cn-hangzhou.aliyuncs.com/52fx/52fx:[镜像版本号]

示例:
[root@instance-p0a4erj8 ~]# docker tag core3.x-swagger registry.cn-hangzhou.aliyuncs.com/52fx/52fx:1.0
[root@instance-p0a4erj8 ~]# docker push registry.cn-hangzhou.aliyuncs.com/52fx/52fx:1.0
The push refers to repository [registry.cn-hangzhou.aliyuncs.com/52fx/52fx]
66fe7dbc7904: Pushed
3391145729e6: Pushed
52d5ea296228: Pushed
239bf536471e: Pushed
cad0d4e88a35: Pushed
831c5620387f: Pushed
1.0: digest: sha256:b37a187840b68d1937ffef2c350bc190f7f435840ece7262ae9445533c5fb766 size: 1583

部署镜像

创建K8S集群,需要创建一个专有网络

需要开通两个授权的权限

创建成功后需要耐心的等待几分钟

接下来就是部署镜像,全是界面操作。


创建好Service->Ingress就可以访问了

service:

1
2
3
4
5
6
7
8
9
10
11
12
13
14
15
16
17
18
19
20
21
22
apiVersion: v1
kind: Service
metadata:
creationTimestamp: '2019-12-14T03:28:23Z'
name: net
namespace: default
resourceVersion: '19318673'
selfLink: /api/v1/namespaces/default/services/net
uid: c8ba0fb3-1e21-11ea-9a91-9e68548c9b68
spec:
clusterIP: None
ports:
- name: http
port: 80
protocol: TCP
targetPort: 80
selector:
app: 52fx-default
sessionAffinity: None
type: ClusterIP
status:
loadBalancer: {}

Ingress:

1
2
3
4
5
6
7
8
9
10
11
12
13
14
15
16
17
18
19
20
21
22
23
24
apiVersion: extensions/v1beta1
kind: Ingress
metadata:
annotations:
nginx.ingress.kubernetes.io/service-weight: 'net: 100'
creationTimestamp: '2019-12-14T03:33:32Z'
generation: 1
name: 52fx
namespace: default
resourceVersion: '19338000'
selfLink: /apis/extensions/v1beta1/namespaces/default/ingresses/52fx
uid: 80bd156a-1e22-11ea-9a91-9e68548c9b68
spec:
rules:
- http:
paths:
- backend:
serviceName: net
servicePort: 80
path: /
status:
loadBalancer:
ingress:
- ip: 39.105.240.144


后面,我们再详细了解一下k8s的相关配置
参考
容器服务Kubernetes版

You forgot to set the qrcode for Alipay. Please set it in _config.yml.
You forgot to set the qrcode for Wechat. Please set it in _config.yml.
You forgot to set the business and currency_code for Paypal. Please set it in _config.yml.
You forgot to set the url Patreon. Please set it in _config.yml.
Your browser is out-of-date!

Update your browser to view this website correctly. Update my browser now

×